Situation Report
Krojanty,
Pomerania Province, Poland, September 1, 1939: On the opening day of the war,
German General Heinze Guderian led the 19th Panzer Corps into the Danzig
Corridor (Pomerania), which separated East Prussia from the rest of
Germany. Early in the battle, Polish
cavalry intercepted German infantry moving toward Gdansk and managed to slow
their progress. However, the Germans
broke through the units of Polish Border Guards, which forced the Polish forces
to retreat towards and secondary line of defense in the Tuchola Forest and at
the Brda River. The 18th
Uhlan Cavalry Regiment was ordered to cover the retreat. While the Polish units were moving into position
as ordered they came across a large group of German infantry resting in a woods
near the village of Krojanty. Colonel
Mastalerz decided to take the enemy by surprise, pulled out his saber and
immediately ordered a cavalry charge toward the resting soldiers.
GAME LENGTH: 9 turns
VICTORY CONDITIONS:
The Poles must eliminate the two German companies from the 76th
Infantry Regiment, then get at least 2 of their Squadrons off the opposite
table edge from where the entered. (the squadrons may be under strength).
THE BATTLEFIELD:

Elements of the
German 76th Infantry Regiment deploy within 18” of the village
workshop (marked with a star). The Poles
get first turn and may enter from ANY one table edge. (Note the fence that runs along a section of
the road to the lower right. The linear
obstacle by the house on the left-hand road is a hedge.
Reinforcements: Beginning on Turn 4, roll a d6. If the result is less than the current turn,
the German 20th Motorized may enter the table from any one table
edge that is not the edge the Poles entered from.
SPECIAL RULES: The 76th Regiment is caught off
guard and unprepared for a fight. They
are also not expecting a Polish counter-offensive from audacious horsemen. Before either Company can fire, they must
pass a Leadership test. If they fail,
they refuse to fight and are withdrawn from the table.
I found this rule to be a little harsh, as failing the roll essentially ends the game. Therefore, I modified the roll so that if the Germans fail the roll, they are pinned and get downgraded from Veteran to Trained for the duration of the battle.
The German player won the previous scenario as an Underdog, therefore, as a Campaign rule, he gets an "advantage" until he loses a scenario, For this battle that advantage is Sporadic Air Support.
GERMAN
ORDER OF BATTLE
Elements
of 76th Infantry Regiment
Confident Veteran
A Company
1 Command Stand
3 Rifle Stands
1 HMG stand
B Company
1 Command Stand
3 Rifle Stands
Medic
Elements
of 20th Motorized Division
Confident Veteran
1 Command Stand in
Kubelwagen
3 Rifle Stands
3 SdKfz 251 Halftracks
*The Halftracks are
treated as having hull-mounted machineguns that must remain on the vehicle for
the duration of the battle.
Sporadic Air
Support
Ju-87 B Stuka
POLISH ORDER OF BATTLE
18th Uhlan Regiment
Fearless Veteran
1st
Squadron
1 Command Rifle team
5 Rifle Stands
1 HMG
2nd Squadron
1 Command Rifle team
5 Rifle Stands
1 HMG
3rd Squadron
1 Comand Rifle team
5 Rifle Stands
1 Medic
All Polish units begin the game as
mounted cavalry.
GERMAN DEPLOYMENT
Both
company commanders chose the workshop compound (marked with the star) as a safe place to rest and eat
their rations with the HMG guarding the entrance and each command stand inside
one of the buildings. The rest were positioned along the fence inside the yard.
POLISH
PLAN OF ATTACK
With
the German deployment zone limited to 3 buildings and any small clusters of
trees surrounding them, I opted to send one company on foot directly at the
first shed. I expected to receive fire
from this location as soon as I moved onto the board. The other 2 Squadrons would come in to either
side, circling around the trees and converging on the workshop cluster from
either side. If all went well they would
reach the compound simultaneously and give the Germans too many targets to fire
upon.
After the Germans were eliminated, the goal was to separate the squadrons (making it more
difficult for the reinforcements to take out more than one of them) and to send
them off the opposite table edge at 3 different points.
Turn 1
The
Poles sent one squadron dismounted (supported by their medic) directly onto the
table using the shed & fence for cover.
The other 2 squadrons remained mounted and entered to either side, using
the trees for cover from any potential fire from the compound. Each of the flanking squadrons had a
machinegun.

The dismounted 3rd Squadron advances on the first shed (in the background) while 2nd Squadron comes in on the left.

1st Squadron coming around on the right. The compound occupied by the Germans is in the upper right.
As
soon as they entered the table the Polish infantry spotted the Germans in the
Workshop yard and popped off several rifle shots to no avail. The German Heavy Machinegun attempted to
answer, but immediately jammed. Both
German companies passed the initial morale tests they were forced to make.

Turn 1 Stuka attack on
the Polish left flank is ineffective despite the number of good targets. The Poles were able to minimize casualties
from the air strikes by spreading out as they approached the German positiosns.
Turn 2
The Squadron on
the Polish right dismounted as they reached the tree line and the heavy
machinegun opened up on the Germans visible in the workshop yard; eliminating
one squad. The Germans passed the
ensuing morale check and the Heavy Machinegun attempted to fire on the
advancing Poles, only to suffer a second jam! They must've let it lie on the ground while they were eating lunch.
The Germans had
the good fortune to have another air strike come in, but the Luftewaffe pilots
pulled up as they weren’t sure where the friendly units were and didn’t want to
hit any of their own men. (I have a house rule allowing aircraft to hit units closer than 16" to friendly troops, but there is a chance of friendly fire once the range is under 18").
Turn 3
The Poles on the left completed their encirclement, unlimbering the heir heavy machinegun and coming up to the trees behind the German compound. The combined attackers were able to gun down another rifle stand and would have
eliminated the heavy machinegun, but for the presence of the medic who kept
them in the fight (another House rule). Never the less, the
company occupying the workshop panicked and routed from the battlefield before the encirclement was completed.
Both dismounted
squadrons assaulted the compound, converging on the defenders at the same time
from two sides. After losing a single
squad, the Germans broke and attempted to flee, but found themselves trapped by
the mounted squadron and surrendered.

1st & 2nd Squadrons assault the remaining Company in the compound; forcing them to abandon the position and run right into the mounted 3rd Squadon behind the workshop.

For the third time the Luftwaffe buzzes the battlefield. This time they're able to pick out the mounted 3rd squadron, but only a single stand was eliminated.
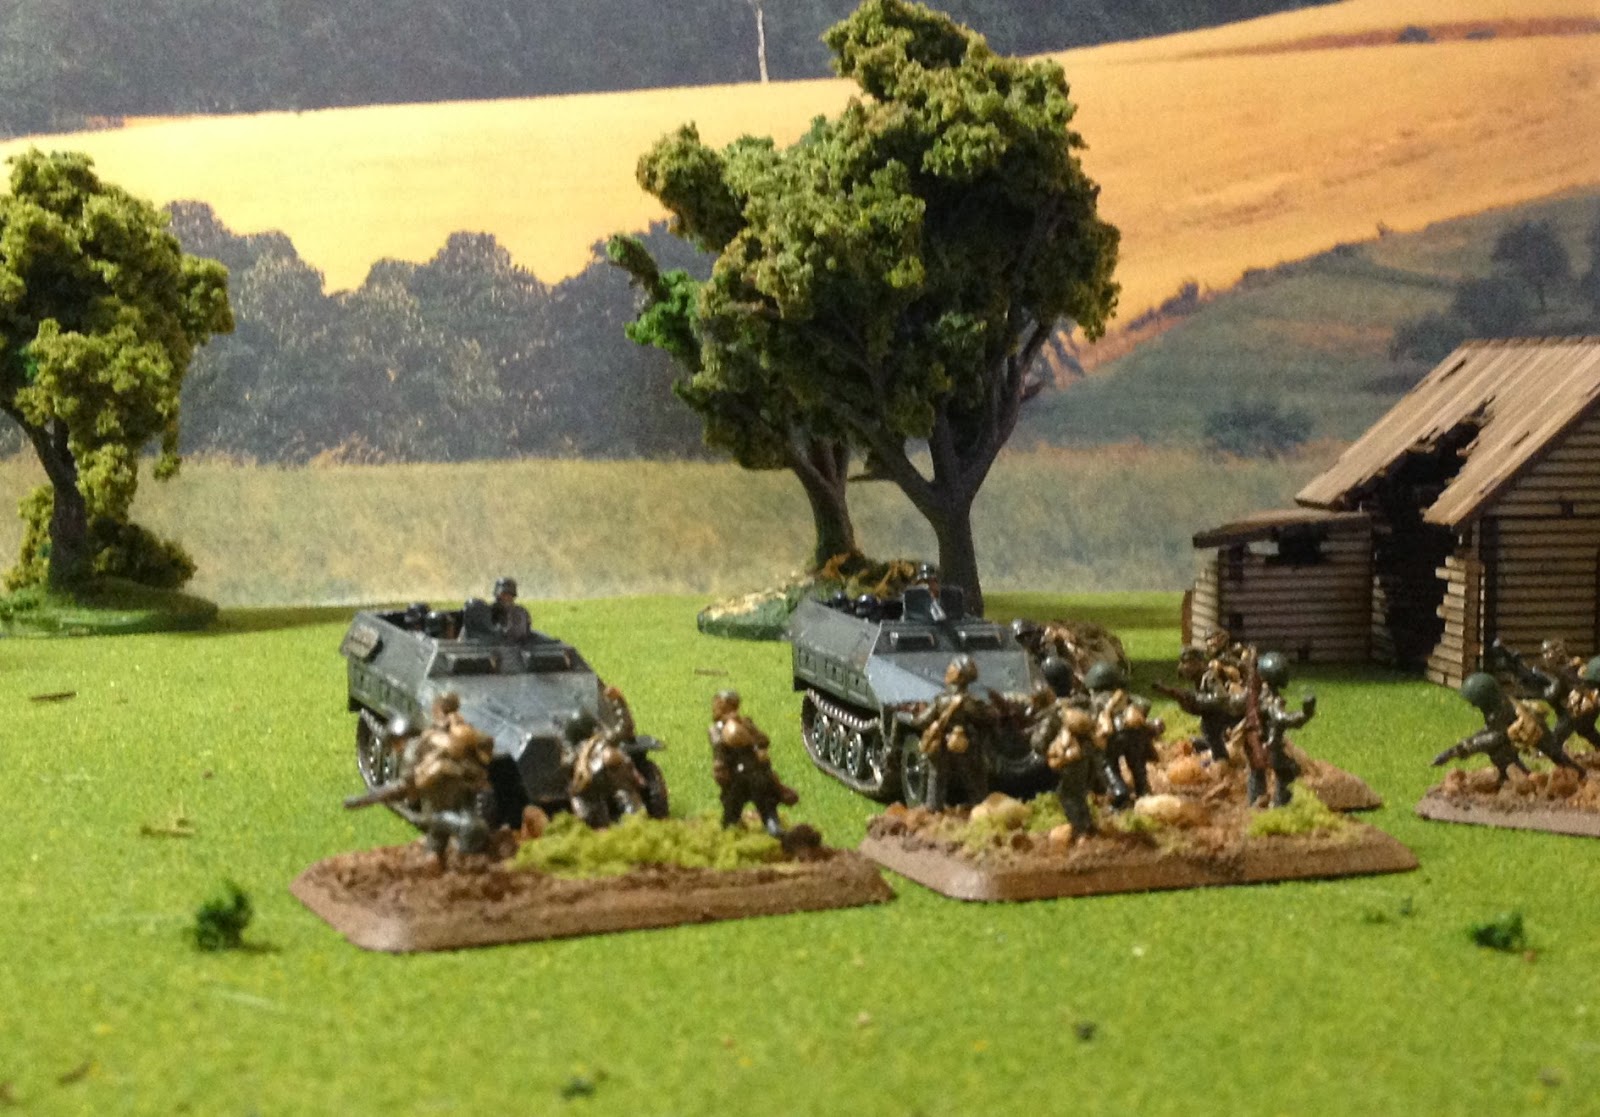
Turn 4

The German
reinforcements appeared promptly on Turn 4, entering the table where 2 of the
Polish Squadrons were planning their escape.
The 3rd squadron (that was already mounted) attempted to ride past the halftracks and lost one of
their number to machinegun fire. The
squadron that had taken the compound chose to make the attempt on foot, while
the 1st squadron called forward their horses.
Turn 5
As the cavalry
attempted to get away, all 3 machineguns on the halftracks opened up and cut
them down. Only the command group and
the heavy machinegun (which had been ordered to stay behind and cover their
escape) were left standing. The
dismounted troops, who had been using the cavalry for cover, suddenly found
themselves out in the open.

Mechanized infantry on Old School Cavalry. 3 mounted machineguns extract a toll on the Polish Cavalry as they attempt their escape.

Having mounted up, 1st Squadron attempts to escape the battlefield from another route to avoid the halftracks.
Turn 6
Feeling there
was no other choice, the dismounted squadron ordered a charge and assaulted the
German halftracks. If nothing else, it
would buy time for the rest of the squadrons to escape.
Brave action by desperate men: 3rd Squadron assaults the German halftracks.
The Assault
proved suicidal as all 3 stands that assaulted the armored vehicles were
beaten. Watching their comrades get
wiped out by the Germans, the rest of the squadron broke and fled from the
battlefield.
From this point,
it was a quick mop-up as the machinegun-mounted halftracks mowed down the
remaining command stand and heavy machinegun from the 1st Squadron.
With only one of the Polish squadrons getting off the table, the Germans were
able to chalk up another victory!
AFTERMATH
Although the tactic of
a cavalry charge was not the main weapon of the Polish forces, the tactic took
the Germans by complete surprise and routed them from the woods. The sounds of the battle alerted the units of
the 20th Motorized Division nearby and soon the Polish units were
under heavy machinegun fire. According
to the memoirs of General Heinze Guderian, the Polish cavalry charge impressed
the Germans so much that it sent panic among the officers and staff and it took
the intervention of Guderian himself to get the invasion moving again.
Never the less,
the several hours’ delay was enough to allow the withdrawal of several Polish
units from nearby Chojnice southward and to the defensive line in the Tuchola
Forest.
The following
day German war correspondents were brought to the battlefield including a
reporter from Italy. They observed the
corpses of the Polish cavalry in addition to German Panzers that had arrived on
the scene earlier in the day. An Italian
correspondent sent home an article describing the bravery and heroism of the
Polish lancers who charged the German tanks in vain. Although such a charge did not happen and
tanks were not used in the assault, the Germans used the story for propaganda
throughout the war and the Myth of Krojanty lives on to this day.
Battle
Reenacted: November 24 - December 1, 2014
No comments:
Post a Comment